For my winter session class, I was asked to reflect on my career as an educator. Our professor gave us four questions to think about but mostly asked us to just reflect. As I was writing, I couldn't help but think, this would be a good blog post, so here goes.
I began my teaching career in 1993, so a long time ago. In my birthday month this year, I received my letter from TRS stating I have met my “rule of 80” for retirement. If I hadn’t taken a three-year break to be with two toddlers, I would be two years away from the “rule of 90,” or max retirement. It’s safe to say I’m one of the more experienced educators, not just on our campus but in our district. I don’t know the exact statistics, but I must be in the top fourth for years in the trenches.
I am fortunate I still love my job. In my fourth year out of the classroom, I currently serve as an instructional coach at the high school. My first year “on the other side” was 2019-2020, the year schools shut down after spring break. I often wonder if I had experienced pandemic and post-pandemic teaching in the classroom if I would still be satisfied in my career or be as overwhelmed and stressed as the educators I support. My role during quarantine teaching consisted of creating and presenting virtual training to help teachers deliver online content and rotating with my instructional technology teammates to work our district help desk. It felt as if we worked around the clock but got to be the “heroes” by providing support and understanding for something educators had never done before.
It is a rare day that I dread going to work. Even during the toughest of times in my personal life - an unwanted divorce, a sickly baby, my father’s unexpected death, my mother’s Alzheimer’s, a young adult child struggling with substance use disorder - I have found joy in my career. In fact, I would argue the joy in my profession has helped me get through difficult times. I distinctly recall sitting in my “reading chair” on the last day of school, reading Dr. Seuss’s Oh, the Places You’ll Go to my second group of students ever, and holding back tears as I read about “the waiting place.” I had an “aha” moment that I was in “the waiting place” in my first marriage and that “waiting was not for me.” For two years, I had found so much joy in teaching those little people and growing as an educator that I didn’t dwell on the awful experience of a husband who didn’t choose to be loyal in our marriage. Having a career that I loved gave me the confidence to move past difficult circumstances - knowing there would be more groups of little people to impact and more joy to be found in the classroom.
As I ponder what it will be like to be a retired teacher, I have a hard time envisioning it. I believe I still have much to offer. My career has made the perfect transition from growing students to growing educators. I honestly don’t know my next career step; I find my coaching role fulfilling. I see myself making a difference in growing “little teachers” to impact our next generation of “little students.” What will that look like? I don’t know yet, but beginning this doctoral program has provided excitement to find out.
I registered for this class at the last minute upon the advice of Dr. Dondlinger. I had some prior knowledge of Makerspaces, an interest in STEAM, but absolutely no idea what I was getting into.
I have to admit I was a little apprehensive when I learned we needed to purchase an Arduino kit, but I was up for the challenge, or at least I hoped I was. When I began the first week's Maker Challenge, I would be lying if I said I wasn't frustrated. When I look back over that post, I "see" a girl who wanted to succeed, not disappoint. The first week, I felt like I failed, and I didn't like that feeling.
The class and Dr. B were so understanding and encouraging, that I quickly got over it. I was impressed with how quickly we built a community of learners. This was definitely the type of classroom community I would like the students at Royse City High School to be in. From the beginning of class, I knew I didn't know how to code, and the little html experience I had wasn't serving me well.
After a few weeks of tinkering, making, and learning from peers and co-workers, I had learned to code, a little. Each week, I learned a little bit more, but I also realized the more I learned, the more I didn't know. I wanted to understand how it all worked together. If I read my blogs from the perspective of a teacher to student, I hear a student who is getting more comfortable with learning through failure and not being perfect.
Through this class, I did learn some coding. I am more confident in the general idea of the void set-up and the void loop, and I made some lights dance to Christmas music. Who would have thought?! The dancing lights to Christmas music is the project I am most proud of - even if it didn't do all that I wanted it to do. It gave me confidence that I could do something unexpected, and that I could persevere.
Throughout the class, I continued to struggle with the coding, but I impressed myself with how I learned to follow the schematics and troubleshoot when a borrowed code didn't work for me. I learned more about circuitry than I knew before the class.
I would love for students to have these same opportunities. I really would like to see a Makerspace at our campus. Currently, a small percentage of our student population are enrolled in classes where they get to create. The creating and challenges I had this session have made me a stronger student and I've learned that "old dogs can learn new tricks." Moving forward, I will look for ways to encourage Making at our school.
When I heard the secret ingredient this week, I had a BIG idea! I wanted to take my previous build, add a photoresistor AND a motor to it. I wanted the lights to dance to the music and the motor to turn a Christmas figurine. Of course, the song had to be a Christmas song. I chose to keep Santa Claus is Coming to Town because it reminds me of my mom and Childhood Christmases. I really felt like I was on the right track, but although I learned a lot and have more understanding of the coding than I did last week, I could not get my project to do what I wanted it to do.
I started off with my two-button project from last week, but reduced it to one button and added more lights. In the beginning, I could not figure out how to make the lights dance as I had wanted them to, so I posted to the board for advice.
I didn't quite understand the few responses I got, so I reached out to my friend, Rich. I sent him the code I had and told him what I wanted my project to do - the first step. He was able to give me some notes and I succeeded with my first goal! Woohoo!
I understand more about the setup and the loop. I learned the setup is a collection of the different routines we want the Arduino to run, and the loop is where we tell the Arduino the order of the routines we would like it to run. This is probably a very basic explanation, but it helped me to have this AHA moment. From reading Rich's notes, I realized there was even more flexibility and approaches to writing code than I previously thought. Each coder has their own techniques to help them recall the different components of their commands. I still have a lot to learn, but I'm proud of the dendrites I've built during this course. One of the reasons I continue learning is in an attempt to ward off Alzheimer's since my mom was diagnosed at 59 1/2. I do believe I have learned new things and kept my brain active this week. 😉
Feeling good about my progress, I was confident I could exchange the button in my project to a photoresistor which would initiate the song to play with different shades of light. I tried multiple different configurations. I built and rebuilt. I went back to the practice circuit t for practice, but I could not get it to work. Strike 2 for this week! I decided to nix the idea of the photoresistor and go for the motor. I didn't have enough room on the breadboard to have lights and a motor; I thought it would be fun if a song would play while a Christmas figurine rotated. One of our classmates pondered our ambitiousness, and I believe I have been a little overly ambitious after my success with combining codes. As with the photoresistor quest, I tried taking everything apart and still couldn't get it to work. I searched on Google and tried projects written by others to get ideas, but I just couldn't get it running in the amount of time I had to tinker this week.
I learned some new things even though it didn't work.
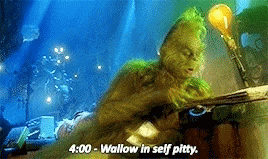
I really wanted to create something cool this week. I am pleased with my progress and work ethic, but I just wanted more. Oftentimes, I felt like this was me this week:
But hey, in the end, all that matters is we are taking risks, learning new things, and growing from our experience. I want the students at RCHS to have the same experiences of growing at their own pace and learning to problem solve and reach out to others. Have a wonderful week everyone.
As I tackled the Arduino this week, I knew I wanted to make the music. Dr. B had put that bug in my ear in some of my blog feedback. I started with the demo circuit and code - it worked perfectly! The arduino is coded to use the buzzer to play a tune.
Image of Project #9 in the handbook set up.
sketch up of project #1
Being the Christmas nerd that I am, I wanted it to play a Christmas song, but not Jingle Bells, because I wanted it to be different. I tried to create a song from scratch - ha, that was tough. I spent way too much time trying to make it work, until I finally searched for a project t that I felt like I could adapt. Using the buzzer and switches, I was able to get my Arduino playing, not one, but two Christmas melodies! I ended up using a project from the web and had fun with it. Each switch activates a different Christmas song when pressed. One of the things I have learned is that there are multiple ways to code the Arduino to do the same thing. This might be one of the things that makes it difficult when figuring out what to do and how to combine. The coding for the project was different than the coding I found for the Christmas songs. For the Christmas songs, I had to use a second tab and upload the "pitches.h" code. It did take me a while to figure this error out, but thankfully there are a lot of resources on line and I was able to figure it out. I learned something new!
Image showing the buzzer and two switches that activate the two different Christmas songs.
Sketchup for final project - only I had 2 switches, not 3
I got the melodies to work, but I have yet to figure but how to combine two different codes. I thought I understood how to incorporate the lighting, but I wasn't able to make the adjustments like I wanted. At some point, I might continue tinkering with it, but I looked up at the clock and it was 12:30 am. Time flies when you're having fun. Realizing I had worked for the majority of my Saturday afternoon and evening without realizing it had been so long, helped me see how far I had come since my first week of frustration with this "thing." 😁 I enjoyed the process and didn't feel frustrated once. I wanted to figure it out, but simply couldn't keep my eyes open, and realized I would have to "play" with my end goal at another time.
I am grateful one of our classmates, Heidy, shared her code with me as she was able to get the lights dancing. I will try for the dancing lights, even if it isn't before posting on my blog.
Below is the code for my final project:
In case you've been curious just how Christmas Crazy my family is and why coding lights would be a welcome addition, here are some pictures of our yard; I'm off to catch up with the inside decorations. This how grad school thing has me a little behind on Christmas cheer.
There are so many things I actually own that utilize this type of coding. I have some Christmas decorations that are motion activated to play music, light up, or both. It's been fun learning how these things actually work. And here's a funny for the week: My daughter, a Mechanical Engineering student at SMU, told me I was "such a nerd," and giggled when I faced time to show her how my project worked! 😍
As I sat down to work this week, I was hoping to knock my work out early and have the rest of the week for holidays with the family, but you know what they say about the best-laid plans. It was not as easy to compartmentalize my life as my mind had imagined.
Setting up the Arduino circuit went fairly well. I started with my dancing lights extension project from last week. I needed to start with something I knew and felt comfortable with. My first step was to get the breadboard set up like a die and the lights working on both sides of the breadboard. Through research, I learned to connect the two sides together with jump wires - negative to negative and positive to positive.
Since I was sort of starting from scratch on the design, I needed to draw out my plan.
Once I learned how to connect the two sides, I repositioned the LEDs into the shape of a die, then I ran the dancing lights code again to be sure the lights would work on both sides of the breadboard. Tada! It worked!
The next part of my project involved getting the lights to light up like a die. Even after watching this week's videos, I am still struggling to understand the code. Several of our classmates found a random led number project, but the LEDs were in a line, not the shape of a die. I was able to copy the code and adjust it by changing the pin locations. I do understand that much about the code. When I first started running the code, I realized it wasn't lighting up like a die because I had didn't have the right HIGH and LOW for the die positions. I was able to fix that on my own. Yay! The beginning of the code initializes the seven LED pins and the button. The next part of the code sets up the LEDs as OUTPUT and the button as INPUT. The loop part of code sets is a random number generator and the different cases call the correct lights to turn on for each number in the spots on the die.
And here is where the holidays and family got all mixed up with the grad school work. I really wanted the lights to dance before they landed on the random number, but I could never figure out how to make that work. I recorded the video you'll see below and THOUGHT I had posted it to the group for advice, but apparently, I did not. My daughter called and needed some mom time and my son, who lives is in Lubbock, flew in for the holiday, and Thanksgiving dinner needed preparing. My bonus daughter wasn't able to spend Thanksgiving with us so we had a family outing at Top Golf. Once the family time took over, I kind of forgot about school 🤷♀️. Once I figured out I had missed an assignment, I began to wonder how I managed the holidays and grad school last year - but guess what? I didn't! I started grad school in the spring. This is all new, but I'm figuring it out. So, here's the video I thought I posted. It is showing the code works to generate random numbers at the click of the button in the different shapes of a die. If anyone would like to share how to add the dancing light code with the code I have, I would love to know how to make it happen.
Here is the graph of the numbers generated from one hundred rolls.
I think students would really enjoy this project. It would be fun if you had enough lights to randomly generate letters or words.
I hope you all had a wonderful Thanksgiving! Happy tinkering this week!
It's been a long time since we have all been together! This mama's heart is happy.
In this week's Arduino challenge, we were asked to tackle Practice Circuits #3 and #4. Circuit #3 involved programming the RGB light which is an LED light that can make multiple colors when coded correctly. I had always wondered how Christmas lights could be multiple colors in one bulb; at least now I have some idea. When I showed my husband the RGB circuit and colorful light, he asked two questions: 1) What class are you taking that you have to do that? 2) When are you going to program our Christmas lights? (Ha-ha - I think I need a little more practice). Circuit #4 was dancing LEDs. This was fun, once I figured out how to make get everything set up and the code running correctly. Although I am not ready to tackle coding our Christmas light display to music, I am gaining a better understanding of how it could be done.
RGB LED
In the RGB coding the clear LED will light up multiple colors based on the coding of high or low for the blue, red, and green pins. It's all about combing the colors to get the desired color. On my first attempt, the code was correct as I could tell by the blinking light on the Arduino, but my RGB wasn't working.
When I realized that the code was running, but my light wasn't changing colors, I started over and reset everything back up. I believe I had the center wire in the wrong place, but I didn't take a before and after picture. I did, however, take a video of the working program.
Here are some pictures of the board and the working code:
const int RED_PIN = 9;
const int GREEN_PIN = 10;
const int BLUE_PIN = 11;
int DISPLAY_TIME = 100;
void setup() {
pinMode(RED_PIN, OUTPUT);
pinMode(GREEN_PIN, OUTPUT);
pinMode(BLUE_PIN, OUTPUT); }
void loop() {
mainColors();
showSpectrum(); }
void mainColors() {
digitalWrite(RED_PIN, LOW);
digitalWrite(GREEN_PIN, LOW);
digitalWrite(BLUE_PIN, LOW);
delay(1000);
digitalWrite(RED_PIN, HIGH);
digitalWrite(GREEN_PIN, LOW);
digitalWrite(BLUE_PIN, LOW);
delay(1000);
digitalWrite(RED_PIN, LOW);
digitalWrite(GREEN_PIN, HIGH);
digitalWrite(BLUE_PIN, LOW);
delay(1000);
digitalWrite(RED_PIN, LOW);
digitalWrite(GREEN_PIN, LOW);
digitalWrite(BLUE_PIN, HIGH);
delay(1000);
digitalWrite(RED_PIN, HIGH);
digitalWrite(GREEN_PIN, HIGH);
digitalWrite(BLUE_PIN, LOW);
delay(1000);
digitalWrite(RED_PIN, LOW);
digitalWrite(GREEN_PIN, HIGH);
digitalWrite(BLUE_PIN, HIGH);
delay(1000);
digitalWrite(RED_PIN, HIGH);
digitalWrite(GREEN_PIN, LOW);
digitalWrite(BLUE_PIN, HIGH);
delay(1000);
digitalWrite(RED_PIN, HIGH);
digitalWrite(GREEN_PIN, HIGH);
digitalWrite(BLUE_PIN, HIGH);
delay(1000); }
void showSpectrum() {
int x; // define an integer variable called "x"
for (x = 0; x < 768; x++) {
showRGB(x); // Call RGBspectrum() with our new x
delay(10); // Delay for 10 ms (1/100th of a second) } }
void showRGB(int color) {
int redIntensity;
int greenIntensity;
int blueIntensity;
if (color <= 255) {
redIntensity = 255 - color;
greenIntensity = color;
blueIntensity = 0; }
else if (color <= 511) {
redIntensity = 0;
greenIntensity = 255 - (color - 256);
blueIntensity = (color - 256); }
else // color >= 512 {
redIntensity = (color - 512);
greenIntensity = 0;
blueIntensity = 255 - (color - 512); }
analogWrite(RED_PIN, redIntensity);
analogWrite(BLUE_PIN, blueIntensity);
analogWrite(GREEN_PIN, greenIntensity); }
Dancing Lights
Our second programmed circuit for the week was to program a row of lights to blink in different combinations. To make this variety happen there was a lot of coding, that involved the speed of the lights and where the blinking started and finished. Below is a video of dancing Arduino lights. If only I could make my Christmas lights do this to music. I can't even imagine the amount of programming that takes.
In this coding sequence, the lights are numbered according to their pin location. This is what programs the lights when to be on or off. Each LED needs a jumper wire and a resistor. The jumper wires connect to the digital pins. Mine does not look as pretty as the drawing, but it worked on the first try. YAY!
I am proud of myself for getting the circuits built and coding them to work. I am slowly beginning to understand how things work, but I still have a lot to learn. The learning curve is huge, but I am building a lot of dendrites as I tackle each week's challenge.
Code for Dancing Lights.
int ledPins[] = {2,3,4,5,6,7,8,9};
void setup() {
int index;
for(index = 0; index <= 7; index++); {
pinMode(ledPins[index],OUTPUT) }
} void loop()
{
//oneAfterAnotherNoLoop(); // Light up all the LEDs in turn
//oneAfterAnotherLoop(); // Same as oneAfterAnotherNoLoop,
// but with much less typing
//oneOnAtATime(); // Turn on one LED at a time,
// scrolling down the lin
//pingPong(); // Light the LEDs middle to the edges
marquee(); // Chase lights like you see on signs
//randomLED(); // Blink LEDs randomly
} void oneAfterAnotherNoLoop() {
int delayTime = 100; // time (milliseconds) to pause between LEDs
// make this smaller for faster switching
// turn all the LEDs on:
digitalWrite(ledPins[0], HIGH); //Turns on LED #0 (pin 2)
delay(delayTime); //wait delayTime milliseconds
digitalWrite(ledPins[1], HIGH); //Turns on LED #1 (pin 3)
delay(delayTime); //wait delayTime milliseconds
digitalWrite(ledPins[2], HIGH); //Turns on LED #2 (pin 4)
delay(delayTime); //wait delayTime milliseconds
digitalWrite(ledPins[3], HIGH); //Turns on LED #3 (pin 5)
delay(delayTime); //wait delayTime milliseconds
digitalWrite(ledPins[4], HIGH); //Turns on LED #4 (pin 6)
delay(delayTime); //wait delayTime milliseconds
digitalWrite(ledPins[5], HIGH); //Turns on LED #5 (pin 7)
delay(delayTime); //wait delayTime milliseconds
digitalWrite(ledPins[6], HIGH); //Turns on LED #6 (pin 8)
delay(delayTime); //wait delayTime milliseconds
digitalWrite(ledPins[7], HIGH); //Turns on LED #7 (pin 9)
delay(delayTime); //wait delayTime milliseconds
// turn all the LEDs off:
digitalWrite(ledPins[7], LOW); //Turn off LED #7 (pin 9)
delay(delayTime); //wait delayTime milliseconds
digitalWrite(ledPins[6], LOW); //Turn off LED #6 (pin 8)
delay(delayTime); //wait delayTime milliseconds
digitalWrite(ledPins[5], LOW); //Turn off LED #5 (pin 7)
delay(delayTime); //wait delayTime milliseconds
digitalWrite(ledPins[4], LOW); //Turn off LED #4 (pin 6)
delay(delayTime); //wait delayTime milliseconds
digitalWrite(ledPins[3], LOW); //Turn off LED #3 (pin 5)
delay(delayTime); //wait delayTime milliseconds
digitalWrite(ledPins[2], LOW); //Turn off LED #2 (pin 4)
delay(delayTime); //wait delayTime milliseconds
digitalWrite(ledPins[1], LOW); //Turn off LED #1 (pin 3)
delay(delayTime); //wait delayTime milliseconds
digitalWrite(ledPins[0], LOW); //Turn off LED #0 (pin 2)
delay(delayTime); //wait delayTime milliseconds
}
void oneAfterAnotherLoop()
{
int index;
int delayTime = 100; // milliseconds to pause between LEDs
// make this smaller for faster switching
for(index = 0; index <= 7; index++)
{
digitalWrite(ledPins[index], HIGH);
delay(delayTime); }
for(index = 7; index >= 0; index--)
{
digitalWrite(ledPins[index], LOW);
delay(delayTime);
}
}
void oneOnAtATime()
{
int index;
int delayTime = 100; // milliseconds to pause between LEDs
// make this smaller for faster switching
// step through the LEDs, from 0 to 7
for(index = 0; index <= 7; index++)
{
digitalWrite(ledPins[index], HIGH); // turn LED on
delay(delayTime); // pause to slow down
digitalWrite(ledPins[index], LOW); // turn LED off
}
}
void pingPong()
{
int index;
int delayTime = 100; // milliseconds to pause between LEDs
// make this smaller for faster switching
// step through the LEDs, from 0 to 7
for(index = 0; index <= 7; index++)
{
digitalWrite(ledPins[index], HIGH); // turn LED on
delay(delayTime); // pause to slow down
digitalWrite(ledPins[index], LOW); // turn LED off
}
// step through the LEDs, from 7 to 0
for(index = 7; index >= 0; index--)
{
digitalWrite(ledPins[index], HIGH); // turn LED on
delay(delayTime); // pause to slow down
digitalWrite(ledPins[index], LOW); // turn LED off
}
}
void marquee()
{
int index;
int delayTime = 200; // milliseconds to pause between LEDs
// Make this smaller for faster switching
// Step through the first four LEDs
// (We'll light up one in the lower 4 and one in the upper 4)
for(index = 0; index <= 3; index++) // Step from 0 to 3
{
digitalWrite(ledPins[index], HIGH); // Turn a LED on
digitalWrite(ledPins[index+4], HIGH); // Skip four, and turn that LED on
delay(delayTime); // Pause to slow down the sequence
digitalWrite(ledPins[index], LOW); // Turn the LED off
digitalWrite(ledPins[index+4], LOW); // Skip four, and turn that LED off
}
}
void randomLED()
{
int index;
int delayTime;
index = random(8);// pick a random number between 0 and 7
delayTime = 100;
digitalWrite(ledPins[index], HIGH); // turn LED on
delay(delayTime); // pause to slow down
digitalWrite(ledPins[index], LOW); // turn LED off
}
Week 3 Challenge - Combining what we've learned
For this challenge, I chose to combine the blinking LED lights with the pentiometer. I had success and would like to play with it more by additional code for the light pattern.
For this challenge, I understand how the blinking lights work and how the potentiometer controls the speed. I wanted to also use the RGB, but I couldn't figure out how to get that to work. I thought I understood the RGB. The longest lead in the RGB needs to be connected to the ground. I couldn't think how to set it up and code it. Perhaps I will try again next week on or solo build.
As I reflect on my learning this week, I am reminded of students who do well enough to get by in class, but yet might not have a thorough understanding. I am slowly understanding more, yet there are still things I am confused about. I am able to complete my assignments, but I don't always feel confident that what I have done is correct. As an adult, I am pushing through and acknowledging what I know and what I need help with, but do our students do this, or do they just accept defeat and give up on the possibility of understanding fully.
Points to ponder for sure.
Below is my code for the combined circuit challenge.